

Key takeaways
- Planning a built-in coffee machine installation comes down to three questions you must answer before any cabinet is cut: does the opening fit the.
Planning a built-in coffee machine installation comes down to three questions you must answer before any cabinet is cut: does the opening fit the appliance and its ventilation needs, is there a suitable electrical supply behind or beside it, and how will water arrive and waste leave. Settle those on paper first, and the rest of the project becomes a matter of sequencing trades.
This guide is for homeowners and renovators who are adding a built-in machine to a new or remodeled kitchen, coffee nook, or butler pantry. It covers measuring and cabinet design, power, water options, ventilation, and a pre-install checklist. Always follow the specific installation sheet for the model you choose, and bring in a licensed electrician or plumber for any work that touches house wiring or pipes.
Start With the Model, Not the Cabinet
Built-in machines are not interchangeable. Cutout dimensions, depth, door swing, and connection types differ between models and brands, so the safest sequence is to pick the machine first, download the installation manual, and design the cabinet around its stated requirements.
Built-in units generally fall into two layouts: a tall-column design that sits in a full-height cabinet at eye level, and a compact unit that fits in a standard-width niche above a warming drawer or oven. Both usually require a specific niche width, height, and depth, plus clearance behind the unit for connections.
Read the installation sheet for these items
- Niche width, height, and depth, including tolerances.
- Clearance required above, beside, and behind the appliance.
- Door or front-panel swing and the space you must leave to open it.
- Position of power cord or hard-wire connection.
- Water supply type and drain requirements, if any.
- Whether the unit slides out for service and how much room that takes.
Cabinet Design and Placement
Choose a comfortable working height
Because the machine has a drip tray, a bean hopper, and often a milk system, you will interact with it several times daily. Many people place the cup tray at roughly chest to elbow height so they are not bending or reaching. Consider your own height and whether you will use tall travel mugs.
Leave landing space
A built-in unit needs a nearby counter for cups, milk, and tools. Place it within a short step of a fridge if you use fresh milk, and near a sink for rinsing. A nook placed far from either becomes inconvenient quickly.
Plan for service access
Machines need descaling, water filter changes, and the occasional repair. Cabinetry that locks the unit in place with no removal path can turn a simple service call into a demolition. Ask your cabinet maker to leave the unit removable, with trim pieces designed to detach.
Power and Electrical Planning
Built-in coffee machines draw significant power while heating, so they typically need a properly rated, dedicated or lightly shared circuit. Check the manual for required voltage, amperage, and whether the unit uses a plug or a hard-wired connection.
Position the outlet where the manual specifies, often in an adjacent cabinet or behind the niche, so the cord is not pinched when the machine is installed. Do not rely on extension cords or multi-outlet adapters for a built-in appliance. Electrical work should be carried out by a licensed electrician in line with local code.
Water: Tank, Plumbed, or Hybrid
Water is the biggest planning decision, because it affects plumbing, cabinet depth, and daily habits.
| Option | How it works | Best when | Main trade-off |
|---|---|---|---|
| Removable water tank | You refill a tank by hand | No nearby plumbing, simple install | Daily refilling and tank cleaning |
| Plumbed supply | Direct line from a water pipe | Nook is next to a sink or wall supply | Requires plumber and a shutoff valve |
| Hybrid or convertible | Tank now, plumbing kit later | Remodel in stages | Kit availability depends on the model |
If you plan to plumb the machine
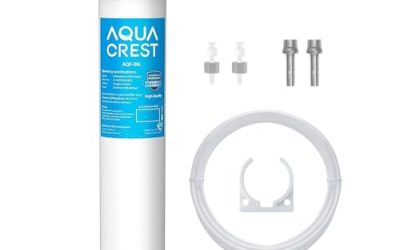
Use the water line type, fittings, and pressure range specified by the manufacturer. A filter inline with the supply helps protect the machine from sediment and scale, but check compatibility with your model. Install an accessible shutoff valve so you can isolate the machine without turning off the whole house, and a licensed plumber should handle the connection.
Drain requirements
Some machines drain internally into a removable tray, while others can connect to a waste line. A waste line adds convenience but requires a trap and correct slope, so confirm this with the plumber early. If you stay with a drip tray, make sure it is easy to pull out and empty.
Ventilation and Heat
Built-in machines produce heat and steam. Surrounding cabinet panels need enough clearance, and the niche needs air flow as the installation sheet requires. Never box in a unit without the specified gaps, and keep combustible materials away from hot surfaces.
If the niche sits above or beside an oven or warming drawer, check the manufacturer guidance on combining appliances in the same column. Some arrangements are allowed with spacing and heat shields, while others are not.
Finishes, Panels, and Aesthetics
Many built-in machines are offered in stainless, black, or white fronts, and some can be matched to cabinetry with custom panels. If you want a flush look, confirm whether panel-ready versions exist and how thick the front panel may be. Plan the handle style and hinge direction so the door does not collide with the neighboring cabinet or an appliance.
Pre-Install Checklist
- Confirm the exact model and download its installation manual before ordering cabinets.
- Measure the niche in three places for width, height, and depth, and compare to the stated tolerances.
- Locate the electrical outlet or hard-wire point and have an electrician verify capacity.
- Decide on tank, plumbed, or hybrid water supply and book a plumber if needed.
- Check ventilation clearances and the space needed to open any door or tray.
- Leave a plan for removing the machine for service without damaging cabinets.
- Check delivery dimensions so the unit can reach the kitchen through doors and hallways.
Timeline and Sequencing
The order of work matters. Cabinetry usually goes in first with the niche built to specification, while the electrical and plumbing rough-in happens before the final wall finishes. The appliance goes in near the end of the project to avoid dust and damage, followed by testing, descaling, and the first cleaning cycle described in the manual.
Build in a short buffer between cabinet completion and final install in case measurements need to be adjusted. Appliance cutouts that are a few millimeters off can be corrected on a bare cabinet far more easily than after the finish is applied.
Common Planning Mistakes
- Ordering cabinets before choosing the machine, then discovering the niche is a few millimeters off.
- Forgetting door swing, so the machine front collides with a neighboring cabinet or appliance when it opens.
- Putting the outlet inside the niche where the plug is crushed against the back panel.
- Skipping a shutoff valve on a plumbed line, which turns every service call into a house-wide shutdown.
- Placing the machine too high or too low for comfortable daily use, especially for cups and milk jugs.
Most of these come from planning the room before reading the manual. A thirty-minute read of the installation sheet and a full-size cardboard mock-up of the niche will catch the majority of them, and it is the cheapest insurance in the whole project, especially as you finalize a plan in 2026.
Related guides
- How To Shop Black Friday Coffee Deals Without Overpaying
- How To Make Coffee While Camping Without A Coffee Maker
- Bottomless Portafilters For Commercial Machines
Frequently Asked Questions
Do built-in coffee machines need a dedicated circuit?
Many do because they draw high power while heating, but the requirement depends on the model. Check the installation manual and have a licensed electrician confirm what your local code requires.
Can I install a built-in coffee machine myself?
Basic cabinet work may be a DIY job, but electrical and plumbing connections should be done by licensed professionals. Incorrect work can void warranties and create safety risks.
Do I need a plumbed water line?
No. Most built-in machines have a removable tank, and plumbing is an optional convenience on models that support it. Plumbed supply suits nooks next to a sink or a wall with an existing water line.
How much space should I leave around the machine?
Follow the clearances listed for your model, since they vary by brand and design. Leave room for ventilation, door swing, and removal for service.
More from Amazon
Programs that pair well with the guide above. Offers and eligibility are set by Amazon and may change.
Set up recurring deliveries of everyday items on eligible products. Terms and savings are set by Amazon.
Explore Subscribe & SaveCollect the home and kitchen items you want in one registry that guests can shop from.
Create a wedding registryFree shipping on eligible items, Prime Video and more. Eligible new members can start with a free trial.
Start a Prime free trialAudiobooks and podcasts to listen to on the go. Eligible new members can start with a free trial.
Try Audible freeAs an Amazon Associate we earn from qualifying purchases.
Write Your Review
No reviews yet. Be the first to share your experience!